
IRW-220 · Lesson 1 of 12 · 22 min
Reinforcing complex structures
▶ Video coming soon A video version of this lesson is on the way.
On Saturday, October 24, 2026, Shay Donnelly spent his first day off since September in a cold steel shed in the east end of Hamilton. The shed belonged to Stratline Post-Tensioning, the company that will supply, place and stress the tendons on Quarry Point Centre, the parking structure where Shay starts with Crossbeam's rod gang on Monday, December 7. Ruairi Brannigan, Stratline's field superintendent, had offered to run four Saturday mornings for Crossbeam's rodbusters before the job: October 24 and 31 and November 7 and 14. Tobias Reyes brought Renata Haugen, Jules Ostrowski and Shay, and the four of them sat on bundles of sheathed strand with coffee while Ruairi set a dead-end anchor on the bench in front of them.
"Before we talk about strand," Ruairi said, "tell me what was different about the last three jobs you placed." Renata answered first: a parkade transfer slab where the bars were so tight they had to be placed in a set order, a water tank with bars that curved all the way round, and a bridge deck where every bar was coated and had to be carried in padded slings. "That's the course," Ruairi said. "Everything you learned in rod school still applies. These jobs just add more rules on top."
This first lesson looks at what makes a structure complex for a rodbuster, how the planning changes, and how the rest of the course is laid out. IRW-130 taught bar sizes, drawings, hooks, laps, cover, supports, ties and placing in ordinary footings, walls, columns, slabs and beams. This course builds on all of it.
What makes a structure complex
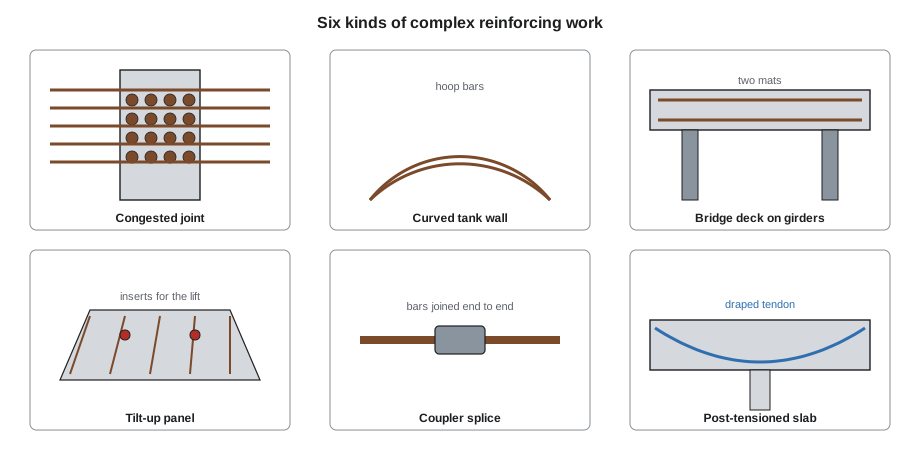
A footing, a wall or a slab in a low building can be placed by a good gang from a placing drawing and a lap card. A complex structure is one where the reinforcing needs more than that: more coordination, more checking, a closer tolerance or a different material. The main sources of difficulty are these.
- Congestion. Heavy bars at close spacing, several layers crossing, beams framing into columns from four sides, and transfer slabs where columns stop and loads move sideways. In a congested area the order in which the bars go in decides whether the last ones fit at all.
- Geometry. Curved walls, sloped and warped ramp slabs, tapered piers, skewed bridge decks, cones and domes. Bars must be bent to radius, run on a skew or change length bar by bar.
- Height and access. Towers, shafts and tall walls are placed from scaffolds, work platforms or moving slipforms, and the steel must keep pace with the concrete.
- Special materials. Epoxy-coated, galvanized, stainless and glass fibre reinforced polymer bars each have their own handling, cutting and repair rules (lesson 6).
- Special connections. Mechanical splices and couplers replace laps where laps will not fit or the design needs full strength (lesson 5), and headed bars replace hooks in tight joints.
- Prestressing. In post-tensioned structures, steel strand is tensioned after the concrete hardens. Tendons share the deck with ordinary bars, and both must be placed to tight profiles (lessons 7 to 11).
- Owners and inspection. Bridges, water-retaining structures and parking structures have their own design standards, specifications and inspectors, and the paperwork is heavier.
Mild steel and prestressing steel
Rodbusters use two words for the steel in a post-tensioned structure. Mild steel, or conventional reinforcement, is the deformed bar the trade has always placed. It does nothing until the concrete cracks or bends and pulls on it. Prestressing steel is high-strength strand or bar that is tensioned on purpose, so that it squeezes the concrete before any load arrives. A prestressed slab still contains plenty of mild steel: bars at the anchors, over the columns, at openings and edges, and around the tendons where the design needs them.
Strand is much stronger than bar. A typical seven-wire prestressing strand has a specified tensile strength of 1,860 MPa, roughly three to four times the yield strength of an ordinary bar. Because it is so strong, it is stretched a long way when it is stressed, and it stores a great deal of energy. That is why lesson 9 is mostly about where not to stand.
Planning a complex placement
On ordinary work, Tobias reads the drawings, checks the bar lists, orders by area and places. On complex work he does all of that and adds a set of steps before the first bar arrives.
- Read the whole set together. The structural drawings, the placing drawings, the post-tensioning shop drawings, the embed and sleeve drawings, and the specification sections for reinforcing, prestressing and concrete. A clash between them is cheaper to fix on paper.
- Find the congested areas and draw them. Tobias sketches the worst joints at full size, or asks the detailer to, so that the gang can see the order of bars before they climb into the forms.
- Work out the sequence. Which layers go in first, which bars must be threaded through stirrups before the stirrups close, when the tendons go in, and when the electrician and plumber need to set their sleeves.
- Check the supports. Two-mat decks, tendons at changing heights and heavy top bars need supports of several heights. Each height is worked out, not guessed.
- Agree the handling. Coated bars, couplers and strand each arrive and are stored differently.
- Agree who inspects what and when. A post-tensioned deck has hold points for the mild steel, the tendons and the anchors, sometimes by different inspectors.
Northbar's detailer, Ashok Menon, and Stratline's detailer, Mireille Pruett, had already met once about Quarry Point by the time of the first Saturday. Their job was to make sure that the mild steel shop drawings and the tendon shop drawings agreed: that bars over the beams left room for the tendon bundles, that the anchor zone steel was on the bar lists, and that the support heights for bars and tendons worked together.
Clear spacing and congestion
In a congested element the question is not only whether the bars fit, but whether concrete can flow around them. Concrete carries coarse aggregate, the stones, and they must pass between bars and between bars and forms, or the concrete will leave voids called honeycomb. The concrete standards set a minimum clear distance between parallel bars.
Under CSA A23.1, the clear distance between parallel bars in a layer must be at least the largest of 1.4 times the bar diameter, 1.4 times the maximum size of coarse aggregate, and 30 mm. The drawings show the bar arrangement, and the rodbuster's job is to keep the spacing even so that every gap meets the minimum, not to squeeze bars to one side.
Worked problem
Checking clear spacing in a beam
A beam is 400 mm wide with 40 mm cover to 10M stirrups (11.3 mm). The bottom layer is five 25M bars (25.2 mm), and the concrete has 20 mm aggregate. What is the clear spacing, and would a sixth bar fit in the same layer?
Show solution
- Width inside the stirrups = 400 − 2 × 40 − 2 × 11.3 = 297.4 mm.
- Five bars take 5 × 25.2 = 126.0 mm, leaving 171.4 mm in four gaps.
- Clear spacing = 171.4 ÷ 4 = 42.8 mm.
- Minimum = largest of 1.4 × 25.2 = 35.3 mm, 1.4 × 20 = 28 mm and 30 mm, so 35.3 mm.
- With six bars: (297.4 − 6 × 25.2) ÷ 5 = 29.2 mm, less than 35.3 mm.
Answer: Five bars give 42.8 mm, which meets the 35.3 mm minimum. A sixth bar would leave 29.2 mm, which does not, so a sixth bar would have to go in a second layer as the designer shows, never squeezed into the first.
Where layers are stacked, the clear distance between layers has its own minimum, and the bars of the upper layer are placed directly above those of the lower one so that the gaps line up. Spacer bars, short pieces of bar laid across the lower layer, hold the upper layer at the right height.
Bundled bars and headed bars
Where there is no room for bars side by side, designers sometimes bundle them: two, three or four bars tied tightly together in contact so that they act as one. Bundles appear in heavy columns and transfer girders. A bundle is placed and spliced as the drawings show, with the splices of individual bars staggered, and the bundle is treated as one larger bar for clear spacing and cover.
Headed bars have a forged or threaded steel head on the end in place of a hook. A head anchors the bar in a short distance and takes far less room than a hook, so headed bars are common in beam and column joints, pile caps and the anchor zones of post-tensioned slabs. They are placed exactly where the drawings show, with the head on the side away from the load, usually just inside the far mat.
Construction joints and sequence
Large structures are poured in pieces. Each construction joint is a place where one pour stops and the next begins, and the reinforcing must carry through it. At a joint, bars continue through the bulkhead or form, are lapped with the next pour's bars, or are joined with couplers. In post-tensioned decks, the tendons may run through the joint, stop at an intermediate anchor, or be stressed in stages. The location of every joint is on the drawings or agreed with the engineer in writing, because a joint in the wrong place can cut through a critical area.
On a parking structure, the pour sequence also decides the rod gang's sequence. Tobias plans Quarry Point by pour: the bottom mat and the tendons for pour 1 must be in and inspected before the concrete truck is booked, while the gang moves ahead to pour 2.
The structures in this course
| Lessons | Topic | What is new for the rodbuster |
|---|---|---|
| 2 | Bridges and highway structures | Bridge design standards, owner specifications, deck mats, skew and camber |
| 3 | Tanks, towers and shafts | Curved bars, hoops, staggered laps, slipforms and climbing forms |
| 4 | Precast and tilt-up | Plant and site casting, lifting inserts, panels lying flat |
| 5 | Mechanical splices and couplers | Coupler types, installation checks, staggering |
| 6 | Coated and corrosion-resistant bars | Epoxy, zinc, stainless and fibre bars and their handling |
| 7 to 11 | Post-tensioning | Tendons, anchors, profiles, stressing, protection and records |
| 12 | Case study | A post-tensioned parking structure from planning to close-out |
Every lesson follows the same rule Ruairi gave on the first morning: the drawings, the specification and the supplier's instructions decide. This course explains what those documents usually say and why, so that a rodbuster can read them, see when something is wrong and ask the right question.
Safety on complex jobs
Complex structures bring the same hazards as ordinary rebar work, plus a few more. Heavy and long bars are lifted by crane into tight spaces, and the rigging rules of IRW-120 apply in full. Work at height on bridge decks, tank walls and slipforms needs guardrails or fall protection all the time. Coated bars are slippery. Stressing equipment works at very high hydraulic pressure, and a stressed tendon is a loaded spring. Impalement protection on protruding bars and strand tails, from IRW-130, matters even more on decks where dozens of dowels stand up at once.
In Ontario, the general duties of the Occupational Health and Safety Act and O. Reg. 213/91 apply to all of this work. Crossbeam adds written procedures for the hazards the regulation does not spell out, and it follows Stratline's procedures wherever the rod gang works near tendons.
Reading a congested detail
When Tobias gets a full-size sketch of a congested joint, he reads it in a fixed order. First he finds the bars that cannot move: column verticals, anchor bolts, embeds and, on a post-tensioned job, the tendons at their high points. Then he finds the bars that must thread through something else, such as beam bottom bars that pass between column verticals, or stirrups that must close around bars already placed. Last come the bars that can be adjusted a little within the spacing tolerance. He writes the order on the sketch in numbers, one to twenty or more, and the gang follows it.
Where the sketch shows that something will not fit, he does not improvise. A bar that clashes with a column vertical by a bar diameter can sometimes be offset with a slight crank if the drawings allow it; a bar that clashes with a tendon or an anchor bolt goes to an RFI. On Harrow Square, two of the four RFIs came from joints like this, and both were answered in a day because the sketch made the problem plain.
Prefabrication
Complex elements are often built partly off the deck. Column cages, beam cages and pile cap mats can be tied on horses on the ground, where the gang works upright and the spacing is easy to check, and lifted into place by crane. Prefabrication saves time and backs, but it moves the hazard to the lift: a long cage is flexible and must be braced and picked at the points the rigging plan shows, or it folds. IRW-120's rules for lift plans and tag lines apply to every prefabricated cage.
Common mistakes
MistakeTreating a complex element like an ordinary one and placing bars in the order they come off the truck.
InsteadWork out the placing sequence for congested areas before the steel arrives.
MistakeSqueezing an extra bar into a layer to make it fit.
InsteadKeep the clear spacing even and at or above the minimum; extra bars go where the designer puts them.
MistakeReading the mild steel drawings without the tendon drawings.
InsteadRead all the drawings together and find the clashes on paper.
MistakeMoving a construction joint to suit the day's progress.
InsteadJoints go only where the drawings show or the engineer approves in writing.
MistakeTreating strand like bar.
InsteadStrand is far stronger and, once stressed, stores dangerous energy; follow the supplier's procedures.
Summary and key terms
- Complex structures add congestion, geometry, height, special materials, special connections, prestressing and heavier inspection to ordinary rebar work.
- Mild steel is ordinary bar; prestressing steel is high-strength strand tensioned on purpose.
- Planning means reading all the drawings together, drawing the congested areas and agreeing sequence, supports, handling and inspection.
- Clear spacing must meet the CSA A23.1 minimum so that concrete can flow around the bars.
- Bundled bars and headed bars save room where there is no space for ordinary bars or hooks.
- Construction joints and the pour sequence set the rod gang's sequence on large jobs.
- Mild steel
- Ordinary deformed reinforcing bar, as distinct from prestressing steel.
- Prestressing steel
- High-strength strand or bar that is tensioned to compress the concrete.
- Congestion
- Reinforcement so close or heavy that placing order and concrete flow become critical.
- Clear spacing
- The clear distance between the surfaces of adjacent parallel bars.
- Bundled bars
- Two to four bars tied in contact to act as one.
- Headed bar
- A bar with a forged or threaded head on the end, used in place of a hook.
- Construction joint
- A planned stopping place between two pours, with reinforcement carried through.
Practice problems
Work each problem on paper first, then reveal the answer to check.
A wall layer has 20M bars (19.5 mm) with 20 mm aggregate. What is the minimum clear spacing?
Show answer
Largest of 1.4 × 19.5 = 27.3 mm, 28 mm and 30 mm, so 30 mm.
Which kind of bar takes the least room at a tight joint, hooked or headed?
Show answer
Headed.
Who decides where a construction joint goes?
Show answer
The drawings, or the engineer in writing.
What two documents must agree before a post-tensioned deck is placed?
Show answer
The mild steel shop drawings and the post-tensioning shop drawings.
What is the typical specified tensile strength of prestressing strand?
Show answer
1,860 MPa.
Lesson quiz · 5 questions
Score 60% or more to complete this lesson.
Create a free account to save your progress, take quizzes and earn a certificate.