
SMW-210 · Lesson 8 of 12 · 17 min
Rectangular transitions and offsets
Most of the duct on a commercial job is rectangular, and rectangular duct changes size constantly: after each branch takes off, where the duct squeezes under a beam, where it meets a coil or a filter bank, and where it connects to equipment. The fitting that does it is the rectangular transition, a four-sided fitting whose ends are rectangles of different sizes. When the small end is also shifted sideways or up and down, the transition becomes an offset transition. This lesson sorts rectangular transitions into the kinds that can be laid out as simple flat pieces and the kinds that need triangulation, and develops an offset transition for the Ashgrove gym.
How rectangular transitions are made
A rectangular transition is made like rectangular duct: from four flat pieces, or from two L-shaped pieces, joined at the corners with Pittsburgh locks or other corner seams from SMW-130. Each side of the fitting is a four-sided panel running from an edge of the large end to an edge of the small end. Because the panels are joined at their edges, each one can be developed separately, as long as its four edges and its shape are known. The work of the pattern maker is to find each panel's true shape.
A panel's true shape depends on whether it is flat. A panel whose four corners all lie in one plane is a flat four-sided shape, a trapezoid or a more general quadrilateral, and can be laid out exactly from its four edge lengths and one diagonal. A panel whose four corners do not lie in one plane is warped, slightly twisted, and has to be treated as two triangles split by a diagonal, as Lesson 5 described. In thin sheet, a slightly warped panel takes its shape when the seams are closed, so it is laid out as two triangles and formed flat; the sheet bends a little along the diagonal as the fitting is assembled.
Concentric transitions
When the small end is centerd on the large end and the two ends are similar in shape, the transition is the frustum of a right pyramid. Its four sides are flat trapezoids, and its corner edges, extended, meet at an apex. It could be developed by radial lines like the turret cap in Lesson 2. In practice, rectangular transitions are rarely similar in shape: a 900 by 500 to a 600 by 400 has a different width-to-depth ratio at each end, so its corner edges do not meet at one point. Each side is still a flat trapezoid, though, because each side's two edges are parallel and lie in one plane.
A flat trapezoid is quick to lay out. Its two parallel edges are the matching edges of the two ends, true in the plan. Its height on the pattern is the true distance between them, the slant height of that side, found from the side's plan offset and the rise, by the right triangle. The ends of the short edge are placed by the plan offsets at each end, measured along the edge. No true-length diagram is needed, only one slant height per side.
Flat on one side
A transition with one side straight, flat on top or flat on the bottom, is extremely common, because it lets a duct change size without dropping its top below a ceiling or raising its bottom off a support. The straight side is a plain rectangle or trapezoid lying flat in its own plane, and the opposite side carries the whole change in that direction. The two remaining sides are trapezoids with one edge square to the ends, sometimes called sloped cheeks. All four panels are flat, and the fitting can be laid out without triangulation.
Duct construction standards limit how steeply the sloping side of a transition may change, because air separates from a side that diverges too fast, the same reason reducers in Lesson 3 have length limits. The SMACNA duct construction standards and most specifications give a maximum angle for diverging and converging sides; a common figure in practice is about 15 degrees from the duct's axis for a diverging side and about 30 degrees for a converging one. Lin's drawings for Ashgrove gave every transition's length, and Kai's rule from Lesson 3 held here too: the length on the drawing is not his to shorten.
The Ashgrove gym transition
The return air from the Ashgrove gym came back through a 36 by 20 in main and dropped to 24 by 16 in where it passed over the stage, to clear the stage lighting truss. To line up with the return duct beyond the truss, the small end also had to move 6 in sideways and 2 in up from the large end's center. Lin's drawing called for a 24 in long offset transition. Because the small end moved in both directions, none of the four sides was square or straight, and two of them were warped.
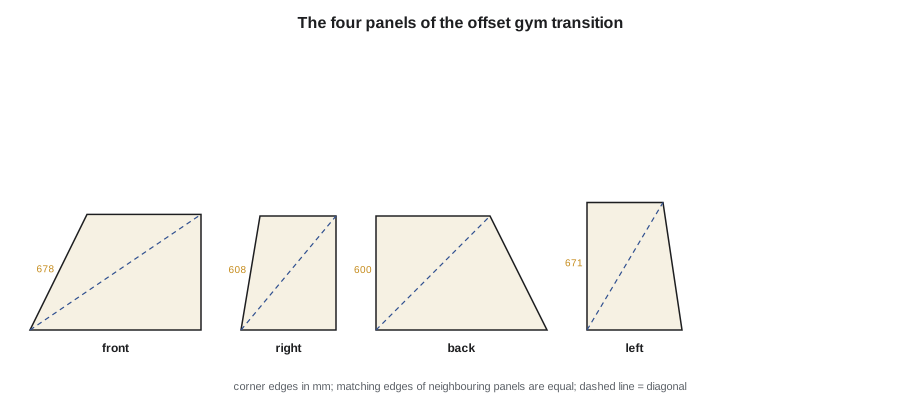
Kai drew the plan of both ends, one over the other, with the offset shown, and lettered the large end's corners and numbered the small end's. Each side panel ran from one edge of the large end to the matching edge of the small end. For each panel he needed its two end edges, which are true in the plan, its two corner edges, which run from end to end and need true lengths, and one diagonal to split it into triangles. The script below calculates all of them from the corner coordinates.
# Rectangle-to-rectangle transition with an offset: true lengths of every side and its diagonal
import math
big = (36, 20)     # in            # (width, depth) of the large end at z = 0
small = (24, 16)        # (width, depth) of the small end
H = 24                # length of the transition
off = (6, 2)            # shift of the small end's center (x, y)
def rect(w, d, cx, cy, z):
    return [(cx - w/2, cy - d/2, z), (cx + w/2, cy - d/2, z), (cx + w/2, cy + d/2, z), (cx - w/2, cy + d/2, z)]
lo = rect(*big, 0, 0, 0)
hi = rect(*small, *off, H)
names = ["front", "right", "back", "left"]
for i, name in enumerate(names):
    j = (i + 1) % 4
    e1, e2 = math.dist(lo[i], hi[i]), math.dist(lo[j], hi[j])
    diag = math.dist(lo[i], hi[j])
    print(f"{name:<6} bottom {math.dist(lo[i], lo[j]):.2f}, top {math.dist(hi[i], hi[j]):.2f}, "
f"edges {e1:.2f} and {e2:.2f}, diagonal {diag:.2f} in")front bottom 36.00, top 24.00, edges 27.13 and 24.33, diagonal 43.45 in right bottom 20.00, top 16.00, edges 24.33 and 24.00, diagonal 31.24 in back bottom 36.00, top 24.00, edges 24.00 and 26.83, diagonal 33.94 in left bottom 20.00, top 16.00, edges 26.83 and 27.13, diagonal 31.24 in
The four corner edges came out at about 24, 24 5/16, 26 13/16 and 27 1/8 in, all different, because the small end had moved in both directions. Each panel was laid out as two triangles: the bottom edge, one corner edge and the diagonal for the first; the diagonal, the other corner edge and the top edge for the second. Kai worked around the fitting in order, front, right side, back and left side, so that each panel's corner edges matched its neighbors', which is the check that the panels will close.
The diagonal is not unique: each four-sided panel can be split by either of its two diagonals. For a flat panel, either gives the same shape. For a warped panel, the two diagonals give slightly different flat shapes, because the panel is not really flat. Aggie's rule was to choose the shorter diagonal, which gives the panel that bends least when the fitting is assembled, and to mark the diagonal on the panel as a light bend line so the sheet could be eased along it.
Rectangular offsets
A rectangular offset moves a duct sideways or up and down without changing its size. SMW-120 developed offsets in round pipe, and rectangular offsets can be made the same way, by parallel lines, as two elbows back to back with a straight piece between. The other common way is a single offset fitting whose two ends are the same rectangle but whose sides slope, like a transition with no change of size. Its top and bottom panels, if the offset is sideways, are parallelograms, and its side panels are rectangles longer than the fitting's length; if the offset is in both directions, the panels may be warped and are developed as triangles.
Offsets of this kind are limited by the same air flow rules as transitions. A steep offset in a short length behaves like two sharp elbows and loses pressure; the standards and the specification set a maximum angle, and on long offsets the fitting is made longer to keep the angle down. On the Ashgrove gym, Lin had combined the size change and the offset into one fitting to save a joint and a support, which is common practice where the angles allow it.
Twist and squareness
Every rectangular transition must come out square at both ends and untwisted along its length: the small end's corners must line up with the large end's, not rotated, and each end must be a true rectangle. Twist creeps in when panels are laid out with the wrong diagonal, cut slightly off, or assembled with the Pittsburgh flanges not fully seated. Kai's check on the formed gym transition was to lay it on the bench on its large end, check that end square on its diagonals, then sight across the small end to a straightedge laid across the large end to see that the two were parallel and not rotated. A 3/32 or 1/8 in twist on a transition this size is enough to make the next duct section hard to join.
Where a fitting must be very accurate, such as a transition to a coil or a filter housing, Keelson made a plywood jig of the large end and checked the small end's position against a plumb bob and a tape before closing the last seam. On ordinary duct, the diagonal check and the sighting check were enough.
Fittings in the shop and in the field
Most rectangular transitions and offsets are now cut on the shop's plasma table from pattern software, which Lesson 11 covers, because the software handles warped panels and allowances automatically and the results are consistent. The hand methods still matter for three reasons: they let a worker check the software's output, they are the only way to make a fitting on site when a measurement changes, and they are tested on the certification exams. Sean's field crew carried a folding square, a tape, a calculator and a notebook of transition formulas so that a foreman could lay out an odd offset on a sheet of duct board or scrap if the drawing missed a clash.
Transitions in duct board and liner
Not every transition is made of bare sheet metal. Where the specification calls for internally lined duct, each panel of a transition is lined on the bench before assembly, with the liner cut to the panel's net shape and fixed with adhesive and pins as SMW-130 described. The liner's leading edges are coated or capped so the air stream does not erode them, and on a sloping panel the leading edge faces the air at an angle, which makes the capping more important. Kai cut liner patterns for the gym transition from the same panel outlines he had used for the metal, less the seam allowances, and marked each liner piece with its panel name so that front, back and sides could not be mixed up.
Common mistakes
MistakeTreating every rectangular transition as a pyramid with one apex.
InsteadEnds of different proportions do not share an apex; develop each side by its own slant height or by triangles.
MistakeUsing a corner edge's plan length as its true length.
InsteadCorner edges run from end to end and need true lengths from the plan offset and the rise.
MistakeLaying out a warped panel as a flat trapezoid.
InsteadSplit warped panels into two triangles with the shorter diagonal, and mark the diagonal as a light bend.
MistakeShortening a transition or offset to make a fit.
InsteadKeep the drawn length, which respects the diverging angle limits.
MistakeAssembling without checking twist.
InsteadCheck both ends square and sight the small end against the large end before the last seam.
Summary and key terms
- Rectangular transitions are made of four panels joined at corner seams, each developed separately.
- Flat panels are laid out from their edges and slant height; warped panels are split into two triangles.
- Concentric and flat-on-one-side transitions have flat panels and need no triangulation.
- An offset transition's corner edges all have different true lengths, found from the plan offsets and the rise.
- Neighboring panels must share equal corner edges, which is the check that the fitting will close.
- Diverging angle limits govern transition and offset lengths; check finished fittings for squareness and twist.
- Rectangular transition
- A four-sided fitting joining two rectangular ducts of different sizes.
- Offset transition
- A transition whose small end is shifted sideways or up and down from the large end.
- Trapezoid
- A four-sided shape with one pair of parallel sides.
- Warped panel
- A four-sided panel whose corners do not lie in one plane.
- Cheek
- A side panel of a rectangular fitting, usually the side with the fitting's profile.
- Twist
- A rotation of one end of a fitting relative to the other.
Practice problems
Work each problem on paper first, then reveal the answer to check.
A side of a concentric transition has a plan offset of 6 in and the fitting is 24 in long. What is its slant height?
Show answer
The square root of 6 squared plus 24 squared, about 24.74 in.
Why are warped panels split with the shorter diagonal?
Show answer
The panel then bends least when the fitting is assembled.
What is the check that four transition panels will close?
Show answer
Each panel's corner edges equal those of its neighbors.
A transition is flat on top. What shape is its top panel?
Show answer
A plain rectangle or trapezoid lying in its own plane.
Lesson quiz · 5 questions
Score 60% or more to complete this lesson.
Create a free account to save your progress, take quizzes and earn a certificate.